Set up Amazon S3 storage for your Manifest backend

This is some basic, sample markdown. In this tutorial, we will show you how to configure Amazon S3 as the storage provider for your Manifest backend.
You will first set up and configure a Manifest project. Then, you'll create an Amazon S3 storage bucket and set up the necessary AWS permissions. Next, you will integrate and configure Manifest to use S3 for file storage. Finally, you will test the setup by uploading and managing files through Manifest.
By the end of this tutorial, you should be able to seamlessly use Amazon S3 as a storage solution for any Manifest project.
What is Manifest?
Manifest is a minimalist Backend-as-a-Service built for speed and efficiency. Define your backend in a single YAML file and instantly get a complete backend, including data management, storage, and business. Manifest allows you to launch projects faster by eliminating the complexity of traditional setups.
What is Amazon S3?
Amazon S3 ( Simple Storage Service) is an object storage service provided by Amazon Web Services (AWS). It offers scalability, high data availability, and performance, allowing users to store and retrieve any amount of data at any time. S3 is commonly used to store files such as images, videos, documents, and other frequently accessed content.
Prerequisites
Before getting started, ensure you have the following:
Required Knowledge:
- Node.js
- Basic understanding of AWS and cloud services
- Manifest: Follow the installation documentation to familiarize yourself with Manifest.
Software Requirements:
- Node.js version 18.x (LTS versions)
- npm (included with Node.js installation) or yarn as a package manager
- An active AWS account. If you don’t have one, sign up on the AWS registration page. A credit card is required to open one. AWS offers a 12-month free trial to test out the Amazon S3 bucket with 5GB of free storage.
Set up Manifest
If you haven't installed Manifest yet, follow these steps:
1. Install Manifest
Execute the following command in your terminal from the root of your project:
npx add-manifest@latest
This will generate a manifest.yml file and install the necessary dependencies.
2. Run Manifest
After that, launch the backend locally:
npm run manifest
Once running, you can access the Admin panel at http://localhost:1111 (admin@manifest.build / admin) and use the REST API at http://localhost:1111/api.
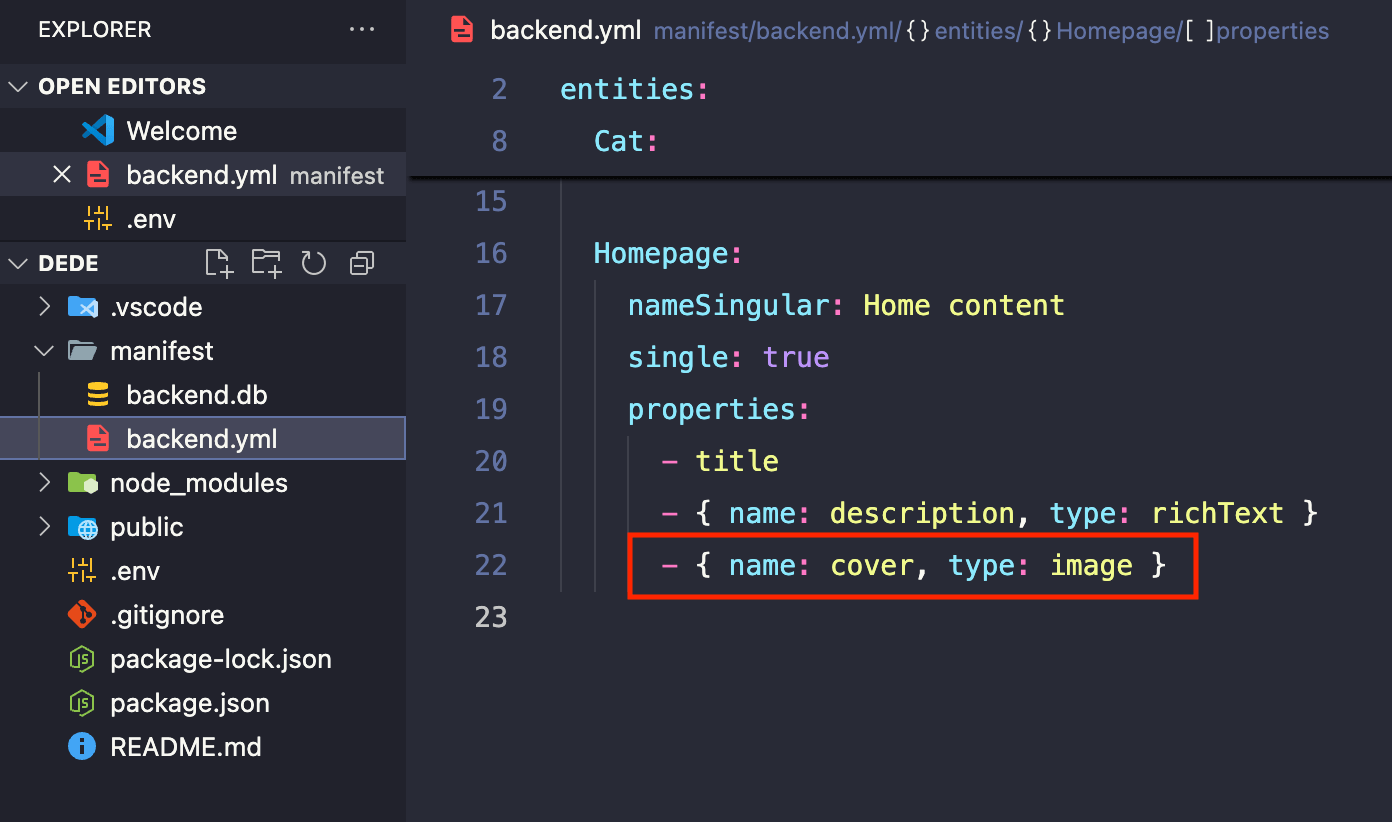
Manifest's default backend includes a home content entity with a property of type image for a cover image. This is enough to test the Amazon S3 integration and move forward.
Set Up AWS
To configure Amazon S3 storage, you need to create an IAM user, set up permissions, and create an S3 bucket.
1. Create an IAM User for Manifest
- Go to the AWS IAM Console.
- Click on Users in the left menu, then select Create user.
Enter a username (e.g., manifest-s3-user).
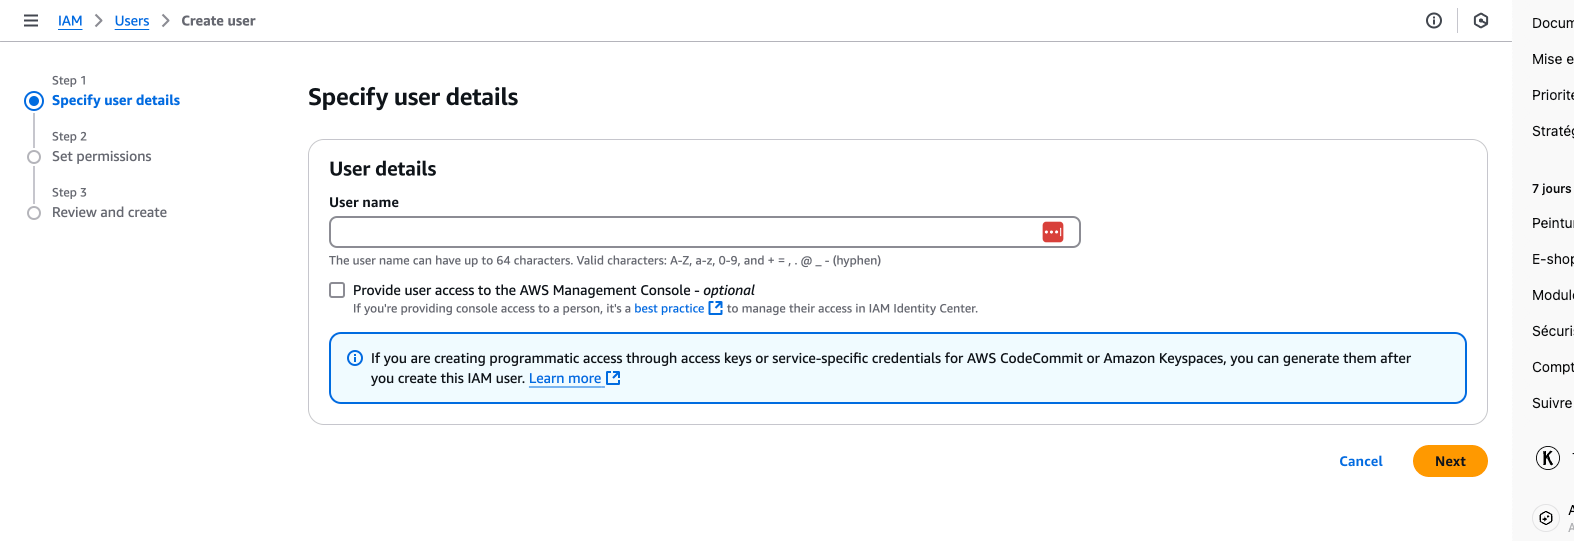
Make sure this checkbox is unselected "Provide user access to the AWS Management Console" (since we only need programmatic access)
- Click Next to set permissions.
2. Set Up Permissions for Amazon S3
- Click Create Group and name it (e.g., ManifestS3Access).
Attach the AmazonS3FullAccess policy to this group by using the search bar under Permissions polciies.
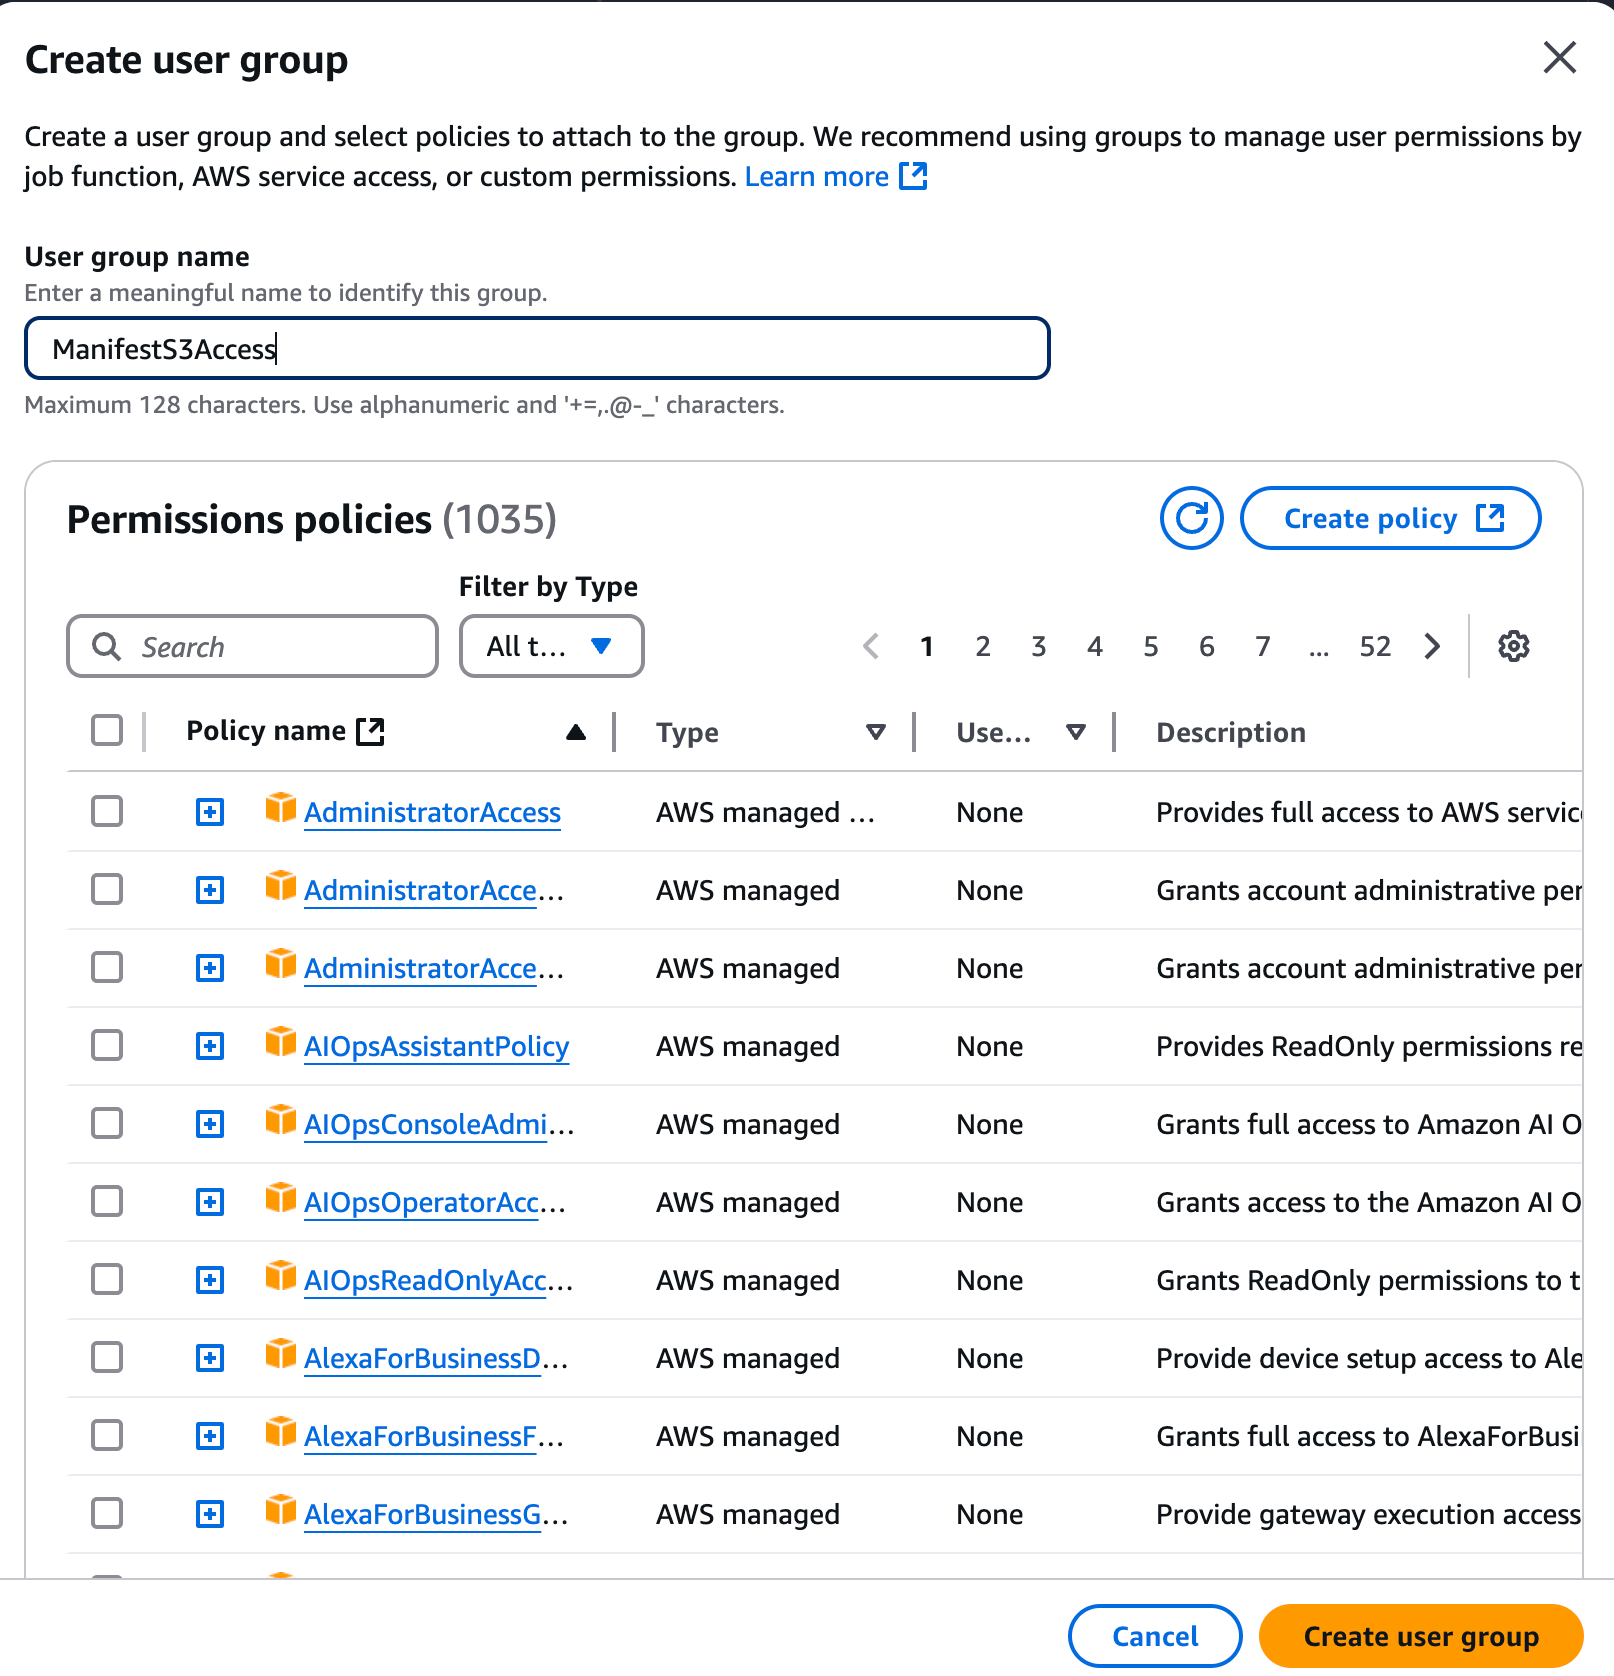
Click Create user group
Select the group checkbox ManifestS3Access and click Next to go to Review and create.
- Take a look at the summary and click Create user.
3. Generate and Download Access Keys for an IAM User Once the user is created:
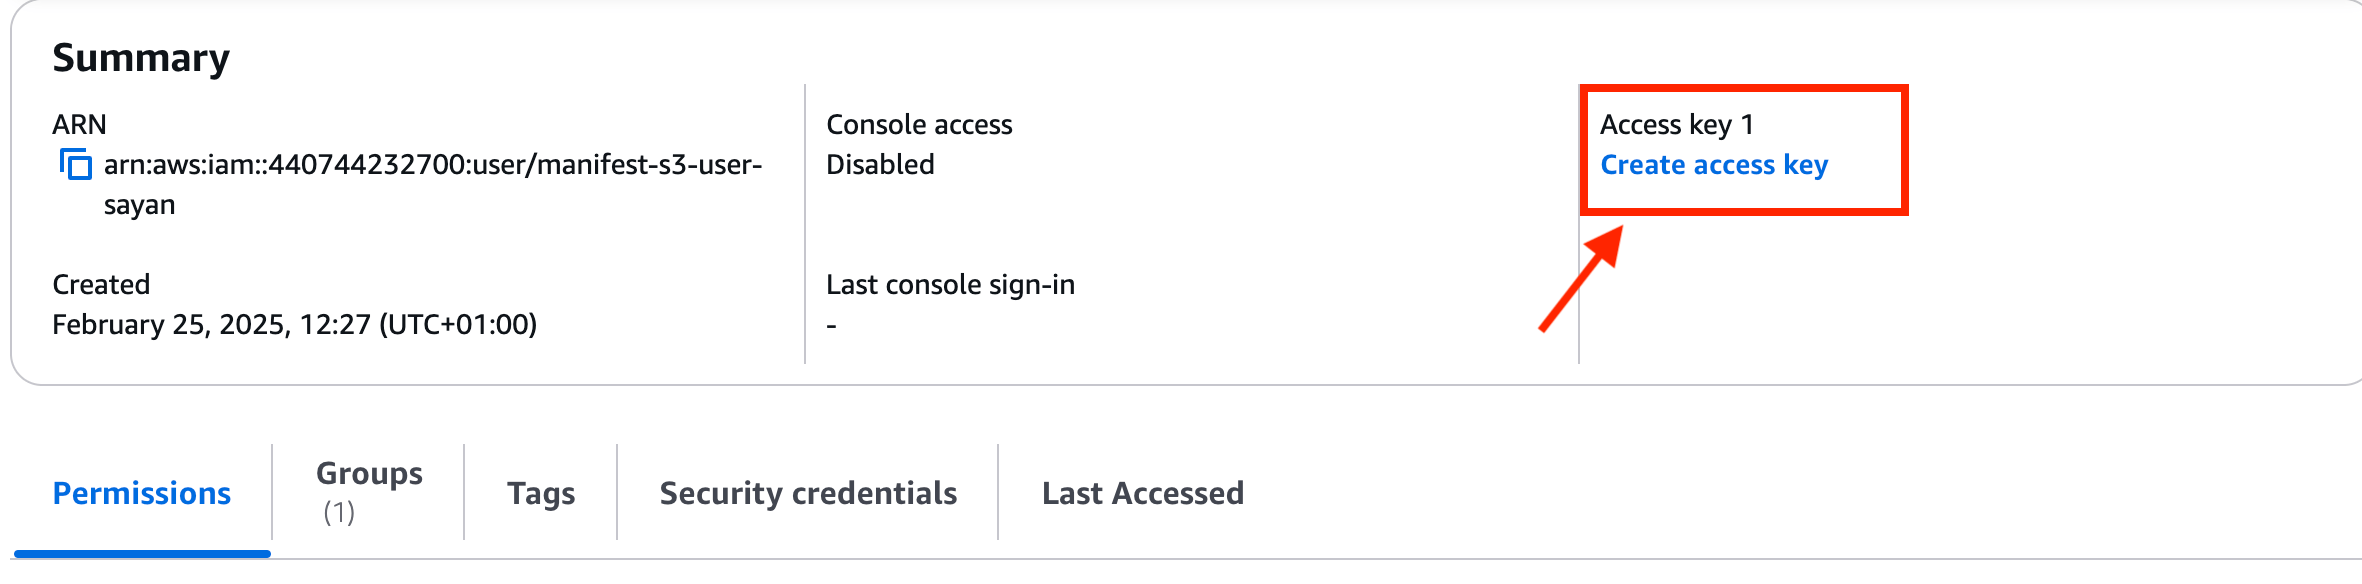
- From the users list page; click on the user you just created (manifest-s3-user).
Click Create access key
Choose the reason for creating the key (e.g., "Command Line Interface (CLI)"), then click Next.
- Click Create access key.
- Download the .csv file and copy the Access Key ID and Secret Access Key for later use.
⚠️ Important: The Secret Access Key is only shown once. If you lose it, you'll need to generate a new one.
Create an Amazon S3 Storage Bucket
- Go to the AWS S3 Console
- Click Create bucket.
Enter a unique bucket name (e.g., my-manifest-storage).
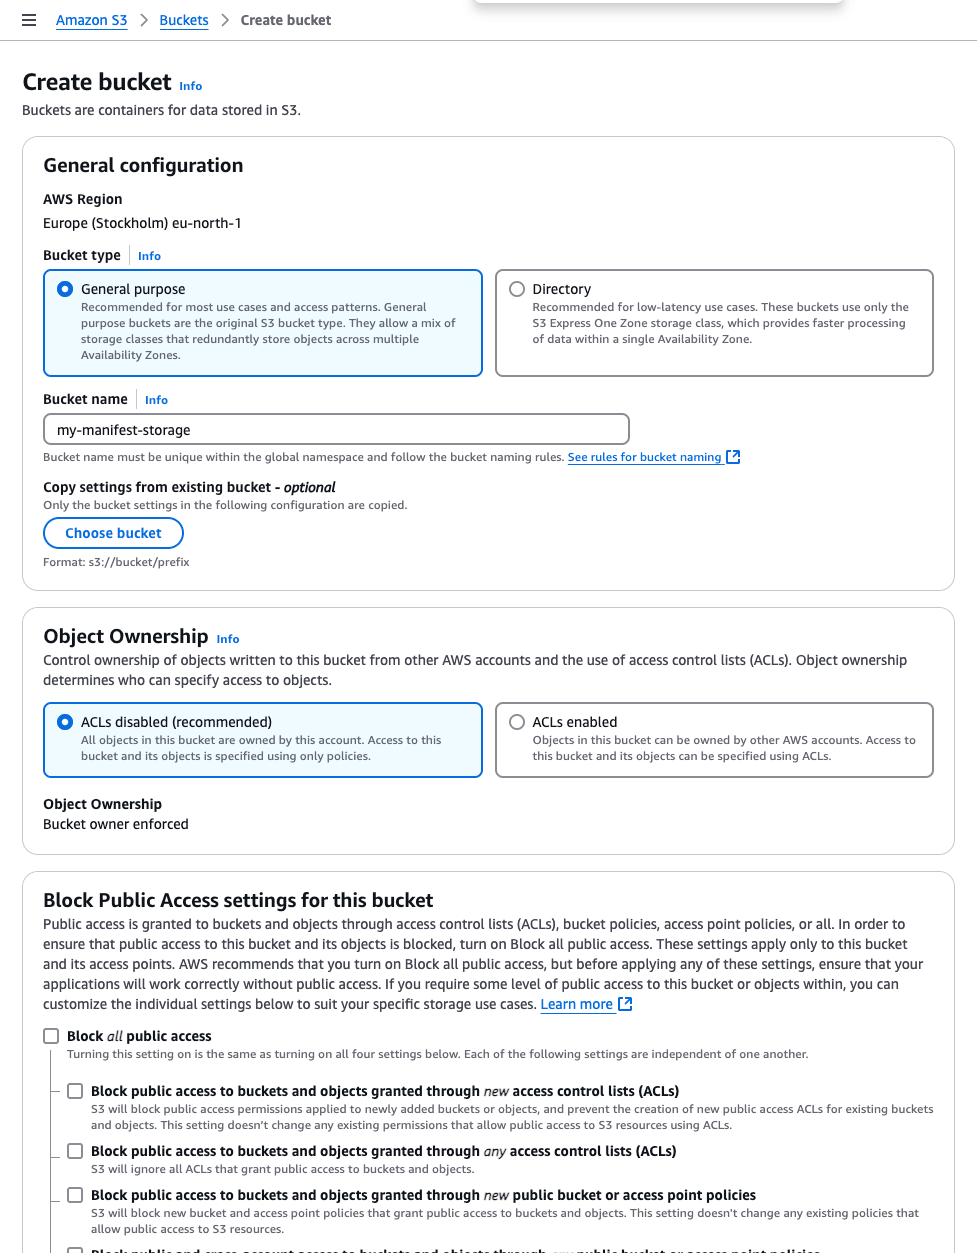
In the Block Public Access settings, do the following:
- Uncheck
Block all public access→ This allows fine-grained control over permissions. - AWS will show a warning. Check "I acknowledge that the bucket might become public."
- Uncheck
- Click Create bucket.
Configure Bucket Permissions for CRUD Operations
Now that the bucket is created, you need to allow your IAM user (manifest-s3-user) to perform CRUD operations.
1. Attach a Bucket Policy
- Open your S3 bucket and go to the Permissions tab.
- Scroll down to Bucket policy and click Edit.
- Add the following policy (replace
my-manifest-storagewith your actual bucket name):
{
  "Version": "2025-02-27",
  "Statement": [
    {
      "Effect": "Allow",
      "Principal": "*",
      "Action": "s3:GetObject",
      "Resource": "arn:aws:s3:::my-manifest-storage/*"
    }
  ]
}
- Click Save changes.
This policy allows the manifest-s3-user to read, write, list, and delete objects inside the bucket.
Set up Manifest to use this S3 bucket
Now that permissions are configured, add these credentials to your environment variables in your .env file:
S3_BUCKET=my-manifest-storage
S3_ENDPOINT=https://s3.eu-north-1.amazonaws.com  # Change if using a different endpoint
S3_REGION=eu-north-1  # Change this to your AWS region
S3_ACCESS_KEY_ID=XXX
S3_SECRET_ACCESS_KEY=XXX
If you know your bucket's region, you can construct the endpoint using this format:
https://s3.<region>.amazonaws.com
For example:
- us-east-1 → https://s3.us-east-1.amazonaws.com
- eu-west-3 → https://s3.eu-west-3.amazonaws.com
Restart your backend with those changes running the following command.
npm run manifest
Now, we'll use the Admin panel to check if S3 is used for uploading and retrieving home cover images.
Test Your Uploads.
Upload an image
- Go to the admin panel (http://loicalhost:1111) and log in with the default credentials admin@manifest.build / admin
Go to Home content and click Edit.
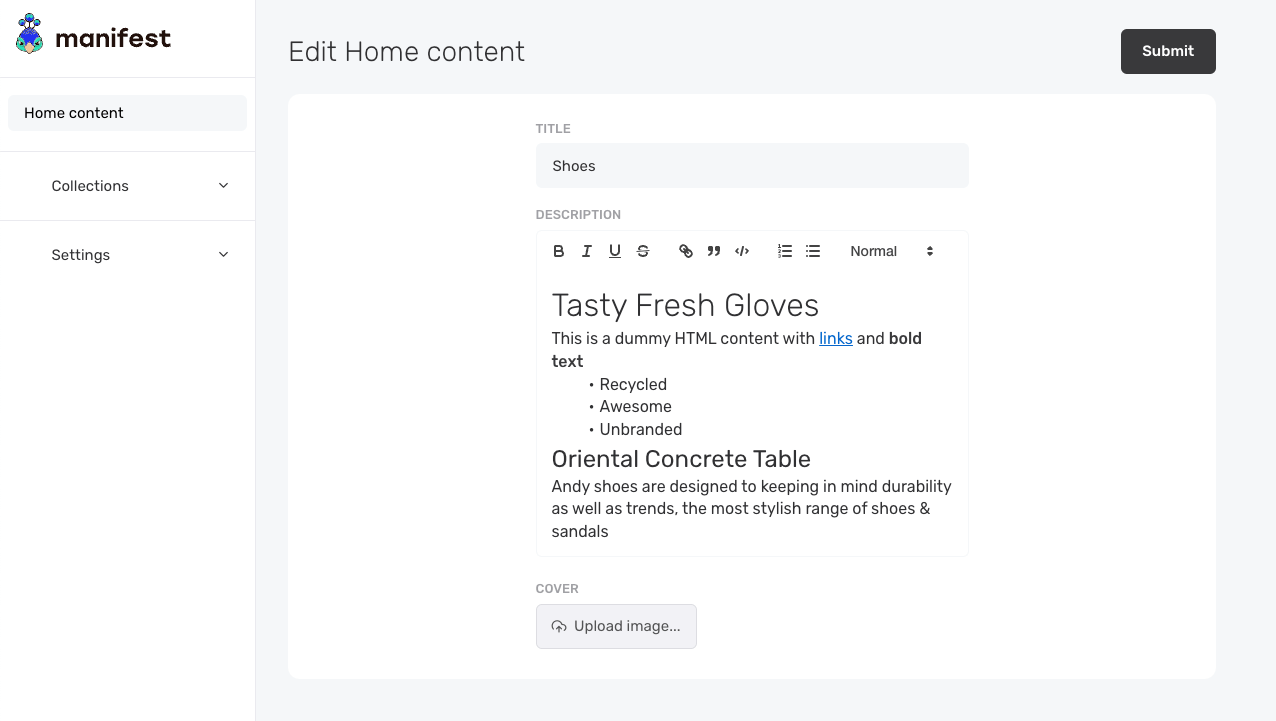
Remove the default image and upload a new one from your device. Once uploaded, a thumbnail should appear.
Click Submit. You will be redirected to the detail page of the home page with the image.
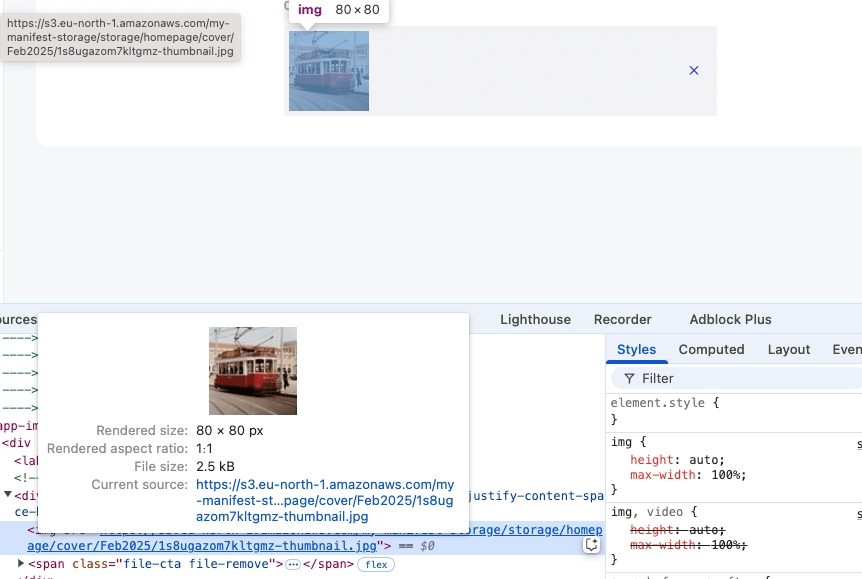
Open your browser inspector and inspect the image URL. You should see the URL pointing to your Amazon S3 bucket.
Conclusion
In this tutorial, we set up a Manifest project and configured it to use Amazon S3 as a storage provider. We created an Amazon S3 bucket, set up the necessary IAM permissions, and integrated S3 with Manifest by updating the backend configuration.
Finally, we tested the setup by uploading and retrieving images through the Manifest Admin panel, ensuring that files were correctly stored in Amazon S3.
I hope this guide has provided the information needed to successfully configure S3 storage with Manifest. If you encounter any issues, refer to the official Manifest documentation or AWS resources for further assistance.
Second Heading
- Unordered lists, and:
- One
- Two
- Three
- More
Blockquote
And bold, italics, and even italics and later bold. Even strikethrough. A link to somewhere.
And code highlighting:
var foo = 'bar';

function baz(s) {
   return foo + ':' + s;
}
Or inline code like var foo = 'bar';.
Or an image of bears
The end ...